
Simple and cheap pinning tutorial.
I'd have made good use of a tutorial like this when i was starting out, as I was never 100% on the equipment I'd need. So thought I'd knock one up for others to use.
Drill:
I use a dremel multitool, they are cheap from ebay and I get so much use out of it. However any handheld drill tool works fine of plastic, just a bit harder drilling into metals.Drill bits:
I use a 1mm drill bit, it's the perfect size for the cheap 'pins' I use.Pins:
Paper clips. Very cheap and for me extremely effective. I tried them after finding some in my pocket after work. It is just to add stability to a joint, this does the trick nicely.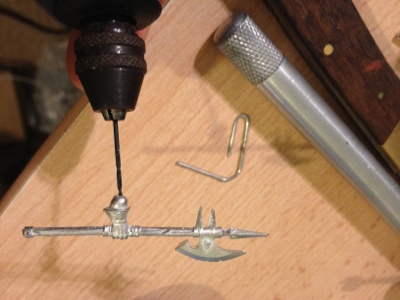
1. If available use a vice to secure the object to be drilled, especially if its metal, as there is a tendency to slip whilst drilling. I use a 1mm drill bit, which is very delecate, do not push, go millimetres at a time and take it easy, as metal will heat up quickly. There is no rush at this point.

2. Use snips to cut the pin to the right size. Mine is roughly 1/2 a centimetre.

3. Next drill a hole where you will be placing the pin, it often doesn't need to be exact, but you want to be as accurate as possible. One way to do this is add a tiny amount of paint to the end of the pin and match up the pieces, this will leave a small drop where the drilling will need to begin. Again take it easy.

4. Next simply add a little superglue to the end of the pin and glue into the halberd hole, then glue the other side and match them up.
Job done. This method will allow those knocks in transit / drops to be laughed off, instead of an hours work re gluing and touching up paint.
No comments:
Post a Comment